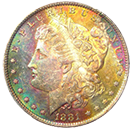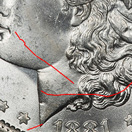

Overpolished Wings
Sources
Search
Contact
Home
Constructing The Eagle's Wing
To understand the overpolishing of wings it helps to understand two critical processes. First, how the engraver creates the wing depth. And second, how dies are polished and subsequently repolished.
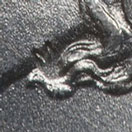
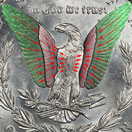
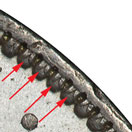
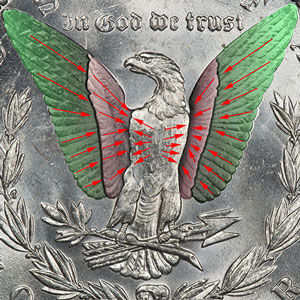
In our first illustration to the right the direction of carving of the wings is important. The engraver creates the layers of feathers by actually varying the thickness of the design. To accomplish the two layers of feathers the outer row is "tucked under" the inner row by making it thinner at the intersection. In this same way the eagles breast is made to stand out when the inner row of feathers intersects with the low point of the breast on each side.
The arrows in this picture indicate the direction of carving used to create the layered effect. There is a secondary effect at play and that has to do with creating the individual rows of feathers in each layer. There must be a slight lowering of the metal between rows to create this effect.
Adding to this complexity was the creation of master dies, working hubs, and finally working dies. If done perfectly then the bottom of the wings would have enough depth to strike coins fully. However if for any reason the process produced a working die with less than optimal depth then the portion of the wing closest to the field (top of the die) could be worn away or polished away more easily.
We also believe that there is a third factor that to our knowledge is unsubstantiated, somewhat improbable, but possible. When the original working model of the coin was carved, it would be possible to carve beyond what would eventually become the field or the top of the die. If this occurred then the transfer lathe might miss this portion of the working model and it would have to be added by the engraver later. Depending on how it was added back, the device could be thin at this point and more easily polished out.
It helps to remember that dies were polished post production to prepare them for use, and repolished as needed to prolong their life. Each polishing eroded the surface layer and eventually intruded on the device design. The skill of the mint employee doing the polishing was a big factor because the process could result in an uneven polishing.
The lowest portion of the outer wings was the first to be affected by polishing. It first appeared as a softening of the detail in the wing feathers, but eventually could progress as far as complete loss of detail.

The Overpolished Wing Varieties
There are at least four groupings for the overpolished wings in the 1881-O series. Remember the eagle's wing designations are not as you see left and right, but rather as the eagle would see them. We will make note of normal wings here also as a fifth category to account for all the VAMs.
The designations depend on the wing and the degree of polishing. The most frequent grouping is an overpolished right wing.
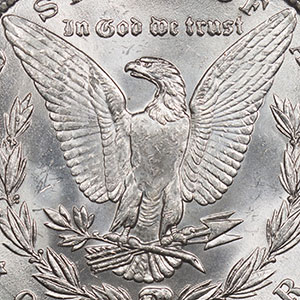
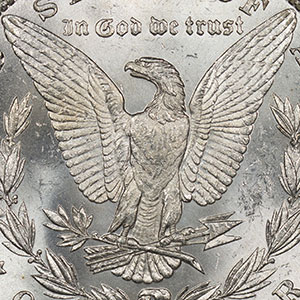
When we refer to a "softened" wing it is early stages of polishing where some detail is lost but the rows of wing feathers remain largely intact. In identification we require the wing trait to be repeated through at least two grades and more if available. In this way we know the feature is not wear related.
As with most things in the VAMing world, there is some judgment needed. Our softened may be someone else's overpolished.
Clashed Dies
Gouge in DOLLAR
Double Ear
Overpolished Wings
Altered Hair
Spiked 8
Similitudes
The Concept
Bearded Eagles
Normal Wing
Normal Wing VAMs
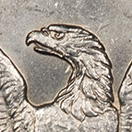
 Dies with normal wings show full detail in each wing for the whole wing and the lines between the feathers. Detail extends all the way from the outer wing to the inner wing.
1F - Pitted Obverse Right Field and Eagle
18 - Doubled 18, Die Gouge DOL
30 - Doubled 1-1, Earlobe, Reverse Legend & Motto
37 - Doubled Reverse Legend & Motto
37A - Doubled Reverse Legend & Motto, Clashed Obverse n, us
37B - Doubled Reverse Legend & Motto, Beveled Field STAT & AM
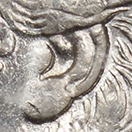
40 - Doubled Ear Inside & Bottom
42 - Doubled Left 8, Die Gouge DO
49 - Doubled 1-1, Die Gouge DOL
51 - Doubled 18, Tripled Left Wreath, Doubled Legend, Clashed Obverse us
Overpolished Right Wing
Overpolished Right Wing VAMs
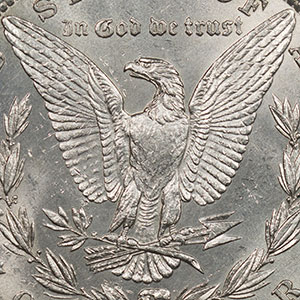 We categorized coins in this group when there was a loss of detail between the rows of feathers that caused the wing to have a flat background. In other words, the rows of feathers were fading into the field as the die was polished into the design.
This occurs near the intersection of the outer and inner rows of feathers were the design for the outer feathers is thinnest in the die. It could be more prominent on the right wing because of die creation or operator skill. It would be interesting to know if most employees were right handed and it that played a role in the process, but we will never know.
Softened Right Wing
Softened Right Wing VAMs
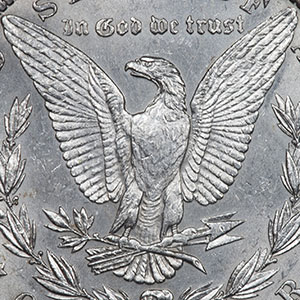 With the softened right wing we are looking at a stage of polishing that is prior to the overpolished versions. If the die lasted long enough and were polished yet again it might progress into the overpolished state.
Softened wings are very much in the category of "I know it when I see it." There is no definition other than you know the detail just isn't quite full or "right." The rows of feathers start to have a flat appearance.
On softened wing varieties there might be loss of definition between one row of feathers, but not the whole wing.
1B2 - Die Gouge in DOLLAR, Clashed Obverse n & st
14 - Doubled First 8, Die Gouge DO
16 Doubled 1, Over Polished Reverse
26A - Doubled 18, Clashed Obverse us
44 - Doubled Reverse Legend & Wreaths, Vertical Die Scratch in Front of Eye
50A - Doubled Ear Bottom Clashed Obverse n & st Reverse M
56 - Doubled Right 1 Lower Right
62 - Doubled Date, Ear Bottom, and Upper Reverse
63 - Doubled Obverse Stars, O Tilted Left
Overpolished Right, Softened Left Wing
Overpolished Right, Softened Left Wing VAMs
Softened Right and Left Wings
Softened Right and Left Wings VAMs
VAMs Needing Additional Examples or Analysis
To Be Determined
 These VAMs lack enough data in our inventory to draw a conclusion about the wing polishing.
6A - Spike in 8, O Tilted Left
33B - Doubled Ear, Clashed Obverse In & st Reverse M
39 - Doubled Phrygian Cap & UNUM
43 - Doubled Left 8 & Phrygian Cap, Die Gouge DOL
45 - Doubled Left 1, O Set High
47 - Doubled Left 8 and Phrygian Cap
55 - Doubled Right 1 Top & Right Side
55A - Doubled Right 1 Top & Right Side, Clashed Obverse n
Getting Started
Collecting The 1881-O
The 1881-O VAMs


